I’m still so excited to see colors every day when I step outside. How ’bout you?
I’m a bit late publishing this, but here they are regardless…
#5 – Oenothera fruticosa (Sundrops) – These cheery yellow blooms have won me over completely. At first I resented their presence in my front flowerbed because they seemed to be everywhere which I interpreted to mean they were “garden thugs”. But I found that they are quite easy to pull when they seed themselves in the wrong spot.
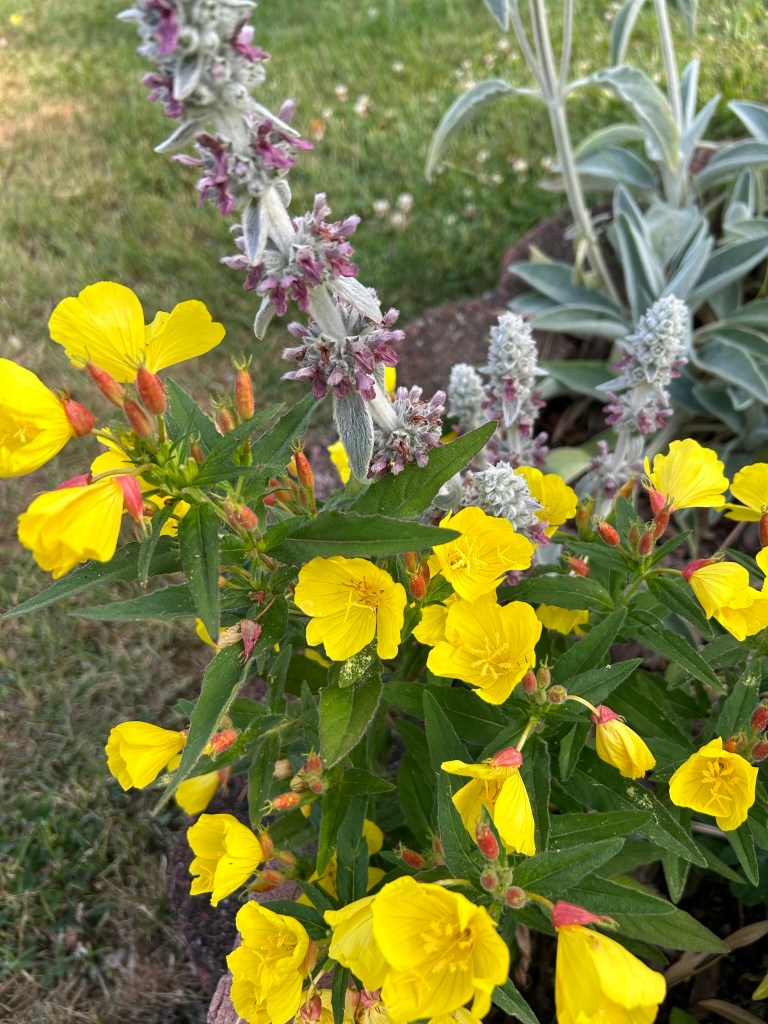
Interestingly, the flower buds on Sundrops are red even though the flowers have no red in them. If you allow them to grow in large groups and clumps in the flowerbed, their yellow can catch the eye from quite a distance. They are really beautiful flowers.
#4 – Sambucus nigra (Elderberry) – I planted two black-leaf Elderberries last summer; the first a ‘Black Lace’ Elderberry the other called ‘Black Beauty’ Elderberry.
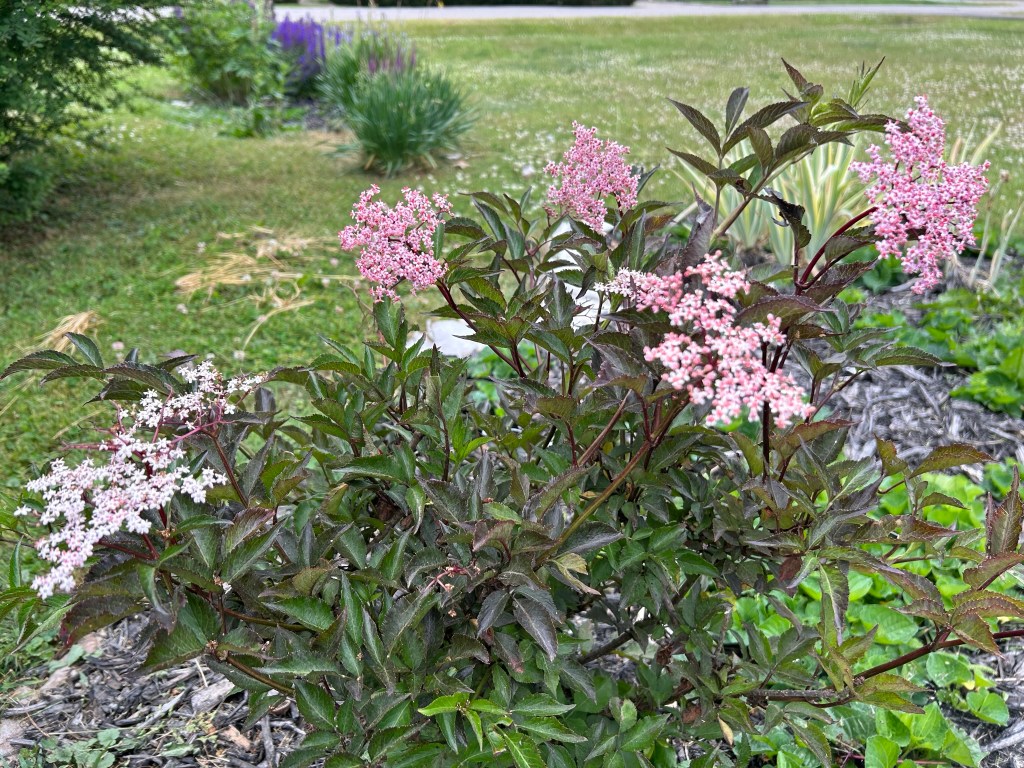
Both were covered in beautiful white and pink blooms which I’m hoping will soon become berries. Both cultivars have gorgeous lacy leaves that appear almost black. They’re both rather small currently, but I’m hoping they’ll eventually grow to be super large gangly plants.
#3 – Iris versicolor (Northern Blue Flag Iris) – These are so very special to me because they are family heirloom plants. They came to me from my husband’s grandmother, Shirley, who got them from her own grandmother, making them at least five generations old.


#2 – Penstemon ‘Midnight Masquerade’ (Beardtongue) – I transplanted this plant last year when we moved to our new house. I couldn’t bear to leave it behind. But, it was July with unbearable heat and the poor plant looked like it wouldn’t make it. I managed to limp the plant through the summer and early fall heat with extra waterings. And sure enough, as soon as spring began warming up the ground, my plant came back better than ever. I was so impressed I bought another one this year for my front flowerbed.
#1 – Heuchera ‘Black Pearl’ (Coral Bells) – I haven’t always had very good luck growing Coral Bells…How about you?
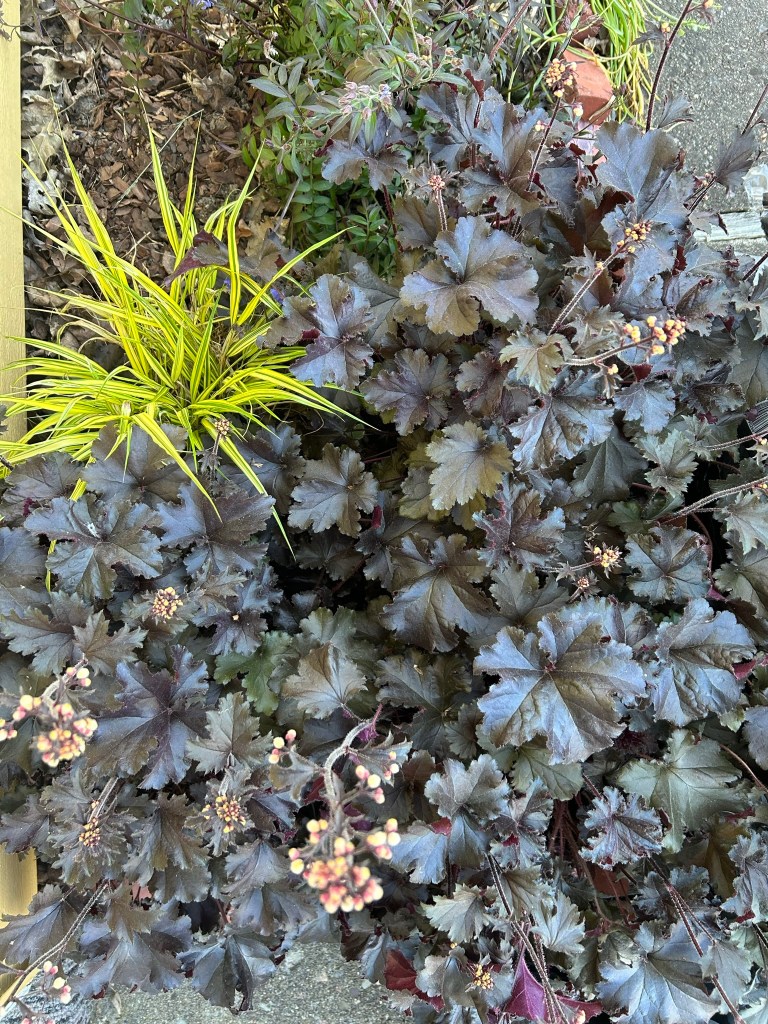
It seemed like every time I’d plant them they would look good for that first season and then the next year they would come back as much smaller rather spindly plants. I’m not even sure why I decided to give Heuchera one last try; probably because these ‘Black Pearl’ Coral Bells are completely stunning. And they must really like their spot in the flowerbed because they came back this spring at double the size they were last year.
Thank you for reading and have a great week! Make sure to follow this blog so you don’t miss any new articles!
Mercy, peace and love be multiplied to you.
Social Media
Instagram @liquidambar_girl
For Mercy, Peace, Love merchandise click here
Gardening Books I recommend:
Attracting Native Pollinators – https://amzn.to/403Fdi5
100 Plants to Feed the Bees: Provide a Healthy Habitat to Help Pollinators Thrive – https://amzn.to/3JIe3aM
The Pollinator Victory Garden: Win the War on Pollinator Decline with Ecological Gardening; Attract and Support Bees, Beetles, Butterflies, Bats and Other Pollinators – https://amzn.to/3ZMeAh7
The Seed Saving Guide: How to Store and Keep Your Seeds of Vegetables, Fruits, Plants, and Herbs Fresh for the Next 3 Years of Crisis – https://amzn.to/3Jmw5Od
Gaia’s Garden: A Guide to Home-Scale Permaculture – https://amzn.to/3mRwdhh
Floret Farm’s A Year in Flowers: Designing Gorgeous Arrangements for Every Season – https://amzn.to/3ZPgYnl
Products I use and (therefore) recommend:
Felco 6 Hand Pruners – https://amzn.to/3WK719c
Felco 2 Hand Pruners – https://amzn.to/3ChzcUU